Some years ago a Dutch friend, Jenny van Diggelen, Blauwwerk, gave me a workshop on Cyanotype Printing. I wasn’t sold right away because I was in the middle of emigrating.
Once in order in my new house, I was again inspired by the blue colour and the possibilities of cyanotype.
It took some getting used to the Spanish sun and sometimes the sun really shines too bright to make nuanced tests. Which makes experimenting all the more interesting.
I can really recommend you to get started with cyanotype if you want a fun hobby that gives satisfying results quickly.
Some of the links are affiliate links. As an affiliate associate, I earn a small commission when you purchase any of the products offered through the shared links at no extra cost to you. This helps me to maintain this website and I thank you for supporting me.
Table of Contents
How to get started with cyanotype?
If you don’t know anything about cyanotype yet, it’s easiest to buy a kit so you have all the supplies you need right away. From there you get a feel for your preferences for certain tools or working methods and you can replace or supplement things to your liking.
What is Cyanotype?
Cyan is another word for a specific shade of blue. The name cyanotype is given by its inventor.
Cyanotype is a 180-year-old photographic process that creates a blue-coloured print after development. The advantage of cyanotype is that you do not need a darkroom. You don’t use photo paper, but thick waterproof paper for the prints.
A brief history
Photography was discovered and developed in the first half of the 19th century. Several processes were investigated and in 1842 John Herschel, an English scientist, photographer and astronomer, discovered the cyanotype.
Herschel may be the discoverer, but botanist and photographer Anna Atkins applied the cyanotype and made it known. She printed cyanotype images of ferns and other plants.
Related: Simple Printing Techniques for the Best Relaxing Hobby
What is the process like?

The process is created with the use of 2 chemicals:
- Potassium ferricyanide (red blood lye salt);
- Ferric ammonium citrate (green).
In a certain proportion, these substances are mixed with water and then with each other. This creates a light-sensitive emulsion that is applied to the paper.
Under strong light, these 2 substances turn Prussian blue. After the chemicals have been washed off with water, a stable and specific blue colour remains with the form depicted in white.
A quick result can be so satisfying

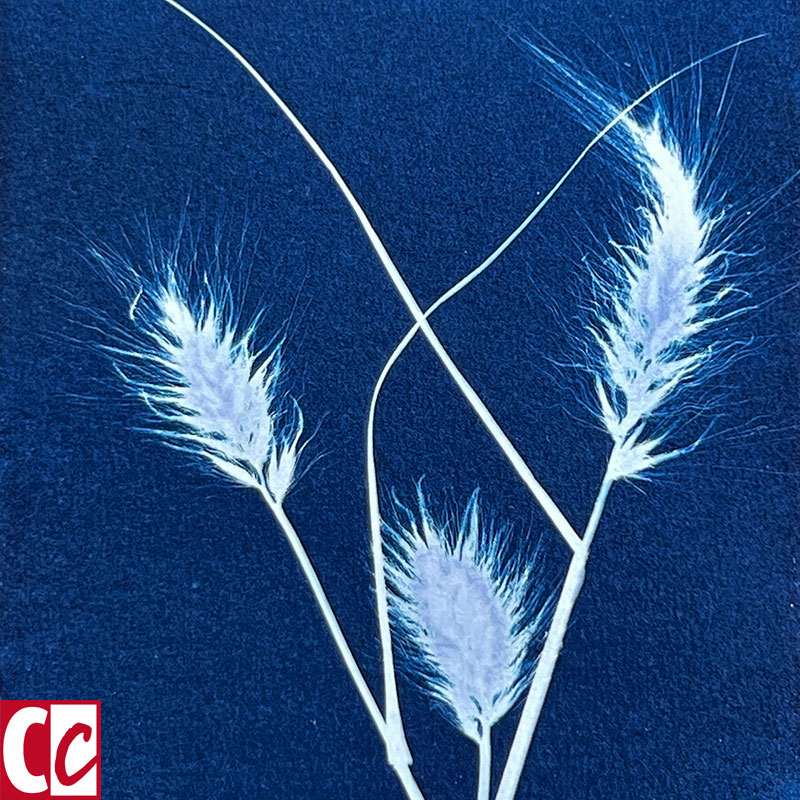
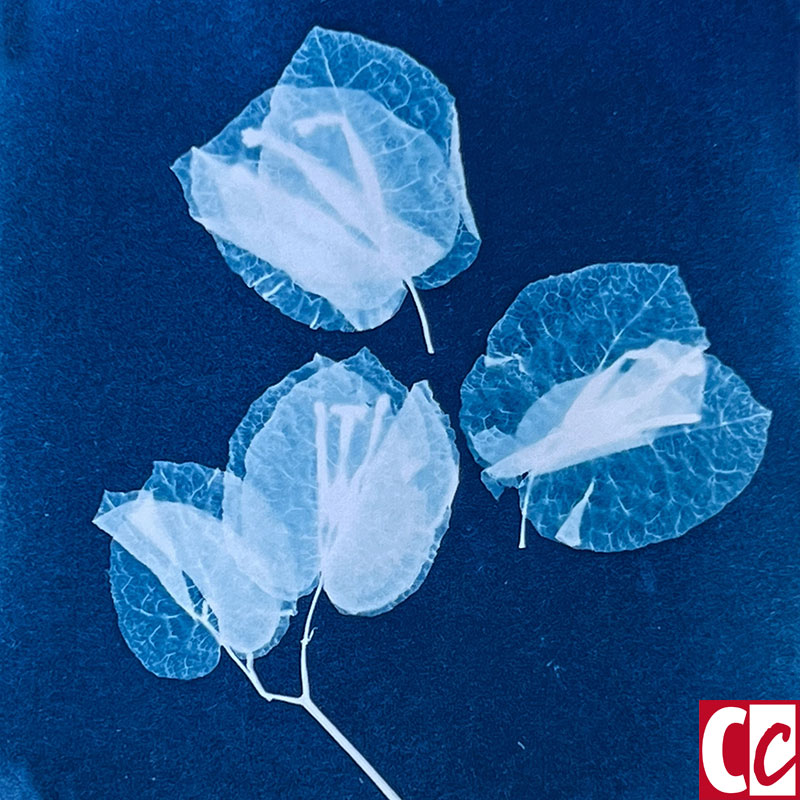
The simplest form of a cyanotype is a photogram. An object is placed on the prepared photosensitive paper and exposed. After rinsing, the paper is white where the object was put.
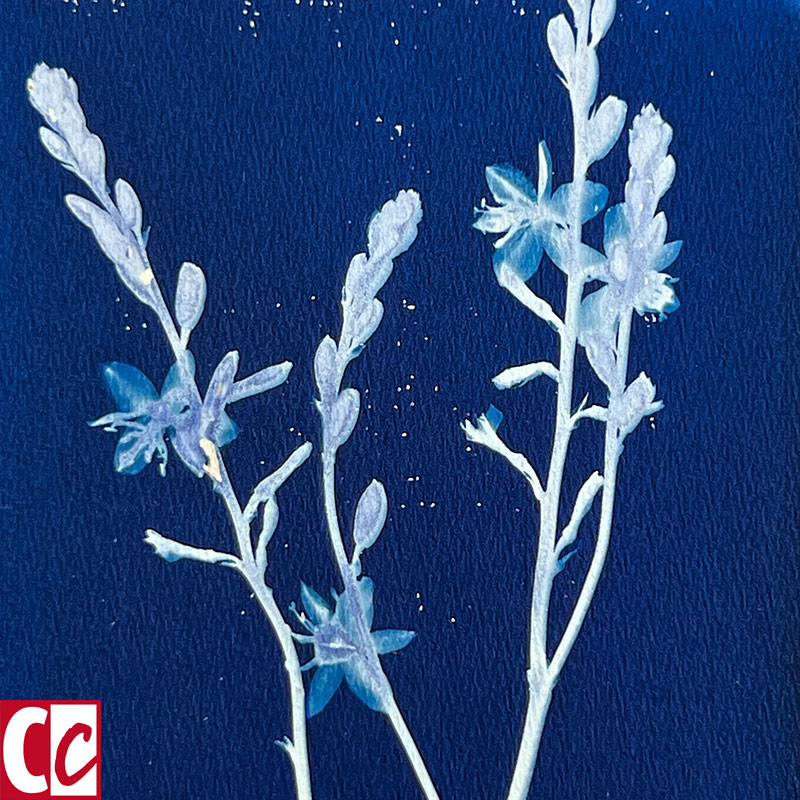
If the object is more or less transparent, for example when you use a white flower, different shades of blue are created.
It is possible to print negatives. Since no enlargement tube is used, as in analogue black-and-white photography, the negative must be the size of the final result.
Other variations are applying salts (soda) or acids (lemon juice) which affect the colour, or working wet which affects the hue.
Related: 2022.05.26 My newest hobby
Supplies needed
- Solution A: 10 g Potassium ferricyanide + 100 ml water;
- Solution B: 30 g Ferric ammonium citrate + 100 ml water;
- 2 Brown vials with plastic screw caps (for both solutions);
- 2 Syringes;
- Watercolour paper (300 grams) or textile (cotton, linen);
- Mixing bowl;
- (Sponge) brush;
- Old newspapers or plastic to keep your workspace clean;
- Latex gloves. Only needed if you are allergic;
- Photo exchange frame or glass plate and hardboard;
- Clamps or washing pegs;
- Semi-dark space;
- Sun or UV light;
- 1 or 2 Developing trays;
- Plastic tweezers;
- Hydrogen peroxide;
- Apron or old shirt.
Objects you could use
- Leaves or flowers. Make sure they can be pressed flat;
- Feathers;
- Textures, for example, wool thread or coarse jute;
- Paper silhouettes;
- Drawings with a black felt-tip pen on transparent film or tracing paper;
- Objects that produce a beautiful silhouette. For example a comb, scissors, crochet mat;
- Etc.
The technique is quite simple
Preparation
Mix solutions A and B in a 1:1 ratio. This solution is light sensitive so you cannot store it.
Carefully cover the paper with a sponge brush or wide bristle brush with an even layer and let it dry in the dark. Avoid accidental spillage on unprotected surfaces.
You can store the prepared paper, provided it is in a non-translucent box or bag. It may look dark after a while but just try to develop it anyway. You’ll be surprised by the result.
Method
Place the paper on the back of the photo frame and put your object on it. Put the glass plate on top and clamp it all together. Make sure the paper is smaller than the photo frame so that your clips stay out of view.
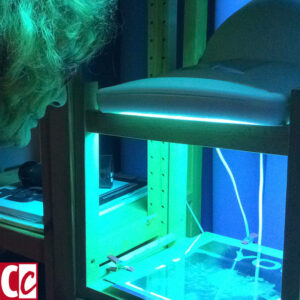
Place in the sun or under the UV light of a facial tanner. The exposure time depends on the strength of the light. Cloudy days require longer exposures than sunny days.
After exposure, remove the paper from the frame and place it in water in a rinsing tray. Keep the water moving so all the chemicals are rinsed off the paper.
Then move the print to the second tray with water where a few drops of hydrogen peroxide have been added. This accelerates the intensification of the blue.
It’s not a problem if you don’t have hydrogen peroxide. Waiting a day will also intensify the colour.
Finally, let it dry on a clothesline or by laying it flat.
Related: Cyanotype – the classic process
Considerations to keep in mind

The type of paper has an effect. How thick is it? Is the surface rough or smooth? Is it very white or slightly tinted?
A good quality watercolour paper, based on cotton, gives the best result but is, of course, also the most expensive.
Instead of covering the entire paper with an even layer, you can paint with the liquid so that you get a remarkable frame. Or you can even paint a picture and expose it.
In addition to paper, you can also print on other materials. For example on textiles or stones. Any material that can withstand water.
Be careful
While working, liquid can get on your clothes, causing blue stains. So it is advisable to wear an apron or an old shirt. If you have sensitive skin or allergies to substances, it is best to wear latex gloves or plastic gloves.

Journal your activities
It is easy to forget to note your activities and even faster to forget what exactly you have done. So if I can give one piece of advice: Keep a log in which you note what you do and what the result is so that you can reproduce a certain result later.
Experiment!
Once you’ve mastered the basics, experiment with exposure times, objects that aren’t flat, additives such as vinegar or lemon juice, or colouring with natural materials such as the spice Curcuma or black tea.
Have fun!
Have you made cyanotypes? Tell me in the comment box below what your findings are.
Ooffff! I love your cyanotype images, but can not see myself doing this… it seems so complicated… maybe it is just anxiety, with all these new substances and techniques.
Pity that you are in Spain and I am in the Netherlands, otherwise I could book a workshop with you!
Did you consider making a video about the process? I would love to copy the master, lol 😀
I am absolutely convinced you could do this as well, Kadanza, trust me. And yes, I am making a video of the process. 😉
My friend Jenny has workshops too. You could combine that with a visit to your mother! Or you will have to visit Spain, LOL. The weather is here better anyway.
Have fun.
Woohoooo, I am eagerly waiting for the video!
I’ll warn you when it’s done. The grandkids are here this week, so I won’t be able to do a lot, LOL.
I guess you will do a LOT, also creativity projects. Just not online, for all of us to enjoy.
Enjoy the family holiday!
LOL, yes, you are right. This morning we made Motherday Cards for the boys to give to their mother next month. We’re quite on time, don’t you think? 😉