
Working with your hands, and especially with clay, is a great way to relax. It is also a way to develop your creativity and is very satisfying. And it does not have to be expensive at all.
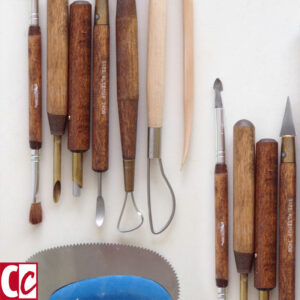
Over the years I had collected a lot of professional tools for my clay processing – wire tools, knives, hole cutters, kidneys. Some were bought new, others in a secondhand shop, and some came from my kitchen drawer.
You can start making ceramics right away because most of these utensils you have in your house anyway. Buy some clay and you’re ready to go.
Some of the links are affiliate links. As an affiliate associate, I earn a small commission when you purchase any of the products offered through the shared links at no extra cost to you. This helps me to maintain this website and I thank you for supporting me.
Table of Contents
Start making ceramics
Clay is an inexpensive material, and it’s simple to start making ceramics without a lot of investment. The necessary tools can be found in the house, so you can first figure out whether you like clay or not before spending money on expensive equipment.
Ceramics for the small purse
If you’re just starting with ceramics it is always advisable to first have a look in your kitchen drawer.
I found it funny that despite the professional knives I bought in the wholesale store, my favourite remained an old potato peeler.
And I often preferred to work with toothpicks and skewers instead of with my wooden modelling tools.
Clay dries your hands
Clay draws moisture from your hands, making them very dry. Besides rubbing my hands with cream every time I was finished for the day, it gave me a lot of containers. I used those to either store moist slip or dry pigments.
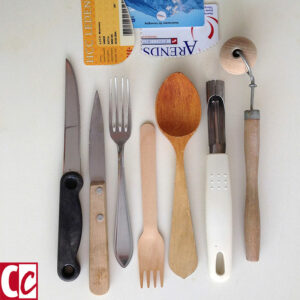
A list of kitchen tools and what you can use them for

- Fork – to roughen the edges of slabs of clay or to make patterns with;
- Spoon – dish up powder and glazes with the concave side and beat the clay into shape with the convex side (sometimes you get wooden cutlery at fast-food restaurants. They’re ideal, so take them with you from now on!);
- Knife – both with a straight and a serrated blade for cutting and scratching;
- Wooden washing brush – attach the stem to a big wooden bead, or push the brush on a slab of clay to decorate;
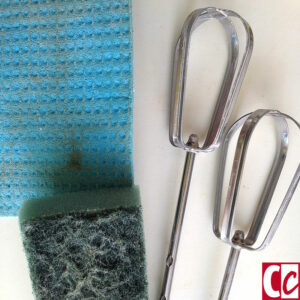
- Mixer – to mix slips and pigments;
- Plastic containers – air-tight storage of work in progress;
- Glass jars – for storage of different coloured slips;
- Wooden and metal skewers – to make holes or as modelling tools when your fingers are too big or not long enough to reach for a certain area;
- Apple corer – perforate;
- Garlic press – you can make small squiggly bits of decoration
- Waffle wipes – ideal for making little rolls;
- Plastic foil – to wrap clay edges and prevent them from drying too soon;
- Garbage bags – for covering your clay pieces when you are not working on them.
Not from your drawer, but just as useful
- Old credit cards – some I use as they are, others I cut in shapes with normal scissors or pinking shears;
- Cream-pots – to store pigments in;
- Paint buckets – I have a couple on my table to rinse my hands and tools in, preventing toxic waste to flush down the drain;
- Paint buckets with lids – air-tight storage of open clay packs;
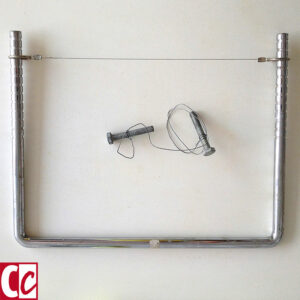
- Iron wire – to cut slabs;
- Guitar string – to cut slabs;
- Bulbs – for polishing;
- Lace curtains or prints on material – press it in the clay for a relief;
- Carpet protectors – for impressing large, evenly spaced holes into clay;
- Pet combs – for impressing small, evenly spaced holes into clay;
- Wooden toothpicks;
- Plastic toothpicks – the tip is finer than any wooden point I’ve seen and the ones I have are nicely rounded for better ergonomic effect.
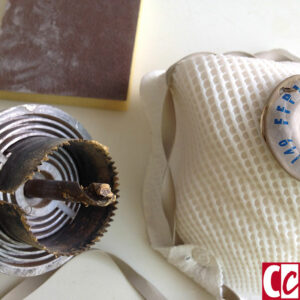
Of course, the list is not exhaustive. There are many other tools, you can use. For example to stamp or carve with, like a hole saw cutter.
But I think I have listed the most important ones. Or do you have something to add that is a useful tip for ceramicists? Please put it in the comment box below. I would really appreciate your effort.
The bought tools I used most

Once your clay hobby expands, you will probably start buying tools. The advantage of starting with available resources is you will know exactly what you miss in a tool or what functionality you desire.
Despite all the mentioned tips here and what I used myself, I never could resist looking around in the shops whenever I needed the raw materials. So I was thinking, what was the top 5 of the bought tools I used?
- Wooden sculpture stand;
- Small plastic knife;
- Ribbon tool;
- Sgraffito knife;
- Cutting harp.
Digging or making your own clay
Another way to start your new hobby in a cheap way is to dig up clay. I wrote more extensively about how you can do that in the article about shades of clay.
Every element of prepared clay, like ball clay powder, grog, and oxides to colour it, can be bought separately. This won’t always make it cheaper than buying a lump of ready-made clay, so you’ll have to calculate first if the price is your reason for doing so.
Related: The Inspiration, Process, and Results of my Abstract Ceramics
Can making ceramic objects really be affordable?
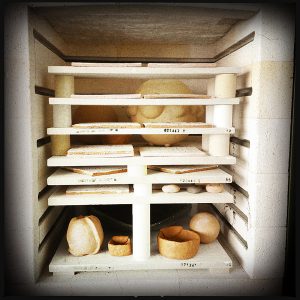
I started by stating “ceramics for the small purse”, but clay needs to be fired. At least once, and if you want to glaze it a second time as well. And a good kiln doesn’t come cheap.
In my early ceramics days I couldn’t afford a kiln, nor did I have room to put it. So I looked up ceramicists in the neighbourhood and found one that rented his kiln. Later I took lessons, mainly to make use of the available kiln.
If you are taking making ceramics up as a hobby, I would advise you not to buy all the expensive stuff immediately, but to look for solutions like this.
Have fun!
Can you add tools you found in the house that are usable for clay? Tell me in the comment box below.
This article is an update. Originally published on 10-05-2013.

Great lists, thank you so much.
I once found a metal kind of wheel when I was hiking. It was probably used as a massage wheel. This was brilliant to make patterns on the surface with.
And bubble wrap is great to transport unfired and fired pieces in.
Thanks for your additions, Marie Jose, they are very helpful. I totally forgot about the bubble wrap but I used it a lot as well.
You must have been so happy to find that massage wheel. Brilliant. Which reminds me, there are a lot of things in nature we could use as well to make patterns. Stones, branches, leaves, and seed capsules for instance.
Great comment and keep on enjoying working with clay. 🙂