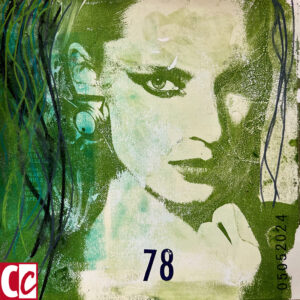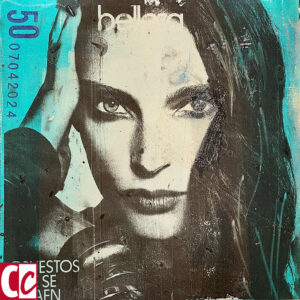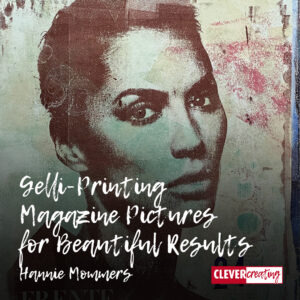
When I started making Gelli prints, I used lots of stencils and all kinds of objects to make textures. I also printed some photos which worked quite well.
This was definitely a matter of beginner’s luck because they all failed when I tried to print pictures a few months after that. 😉
So when this year’s 100-Day Project came along, I sunk my teeth into making loads of prints and discovering how I could make sure the results were more consistent.
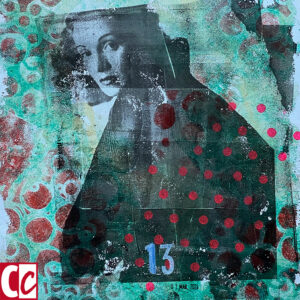
Read my tips for Gelli-printing magazine pictures in this article.
Some of the links are affiliate links. As an affiliate associate, I earn a small commission when you purchase any of the products offered through the shared links at no extra cost to you. This helps me to maintain this website and I thank you for supporting me.
Table of Contents
Gelli-printing magazine pictures
Several factors influence printing:
- The magazine;
- How the chosen photos look like;
- Brand of the paint;
- Thickness of the layer of paint;
- Way of putting the picture on the Gelli plate;
- Drying time in between the different layers;
- The kind of paper you’re printing on.
Related: What is Gelli Printing and What Makes it so Amazingly Easy?
Which kind of magazines to choose?
Quite a lot of magazines are suitable for transferring pictures. I live in Spain, so I mainly tried Spanish magazines. Living in Spain, it is also difficult to name a particular one because it may not be available in your area.

Most magazines I bought were fashion and lifestyle magazines. Beforehand, I flipped through them to see if the pictures were suitable and to my liking. Not all stores approve of this, but most do.
Newspaper and flimsy, cheap magazines usually don’t work well.
What should the photos look like?
The photographs need to have enough contrast. The general impression must remain intact if you look at them through squinted eyes.
In other words, the dark hues need to be dark enough and the light colours need to be light enough. If the picture is too greyish the result will not be good.
Close-ups of faces work well. Fashion photos of dark clothes do well if the background is light and vice versa.


What paint?
During the 100-Day Project, I only used acrylic paint and developed a preference for a limited number of brands.
Yet, my preference doesn’t have to be yours. Do try all the brands you already have because external influences like climate and season may also have an impact.
I love the brands Sennelier and Amsterdam the most. And disliked Lascaux because it was too snotty. Mind you, it may be because my Lascaux tubes are more than 40 years old!
The cheaper brands I only used for backgrounds. They are not consistent enough and I don’t mind irregularities in backgrounds.
I used dark colours for the transfer and light colours for the background.
Related: How to Transfer Photos and Texts to a Gelli Print? 2 Methods
Thickness of the layer of paint
This is probably the most important factor that influences the result. The only thing I can say about it is that the layer of paint needs to be thin enough but not too thin. Which doesn’t help very much, does it?
It is a matter of trial and error, and having a lot of patience! You will develop a knack for it by trying it a lot. When the layer is too thick, all the paint will come off the plate when removing the photograph. If the layer is too thin, the image will transfer messy or not at all.
As said, by trying a lot, you’ll know at some point beforehand when the layer is right. If it is too thick, you can remove the paint with a brayer. It is useful to place scrap paper next to the plate to remove the excess. Add some paint if the layer looks too thin.
Placing the picture on the Gelli plate
Carefully place the magazine page on the rolled-in plate, press the photo lightly and peel the paper off evenly.
Here too, it all comes down to the right moment. If the photo is left there for too long, all the paint will come off when you pull away the paper. Too short, and not enough of the image will be transferred.
Patience and keep trying are the keywords.
Once the picture is peeled off there might be irregular spots. You can remove unwanted spots in the paintless parts with a moistened cotton swab. There is little that can be done about white spots and stains in the paint parts.
Painting in the same colour with a brush later makes too big a difference in color and texture, but you can of course find another way to cover up what you don’t like.

Drying time in between the different layers
The first layer must dry sufficiently so that no details are lost with the next layer of paint.
I let that first layer dry for about 20 minutes, but the length of time also depends on climate and season.
If I want to have different colours, I also let each subsequent layer dry for 20 minutes.
The last layer must be applied evenly and serve as a kind of adhesive layer. As soon as I have applied it with the brayer, I immediately place the blank sheet of paper on it and cover that so that the book that I then put on it for the weight does not get dirty.
I let this dry for 5 to 10 minutes before carefully removing the sheet of paper.
The kind of paper to print on
It is best that the paper you make the print on should not be too thin or have too much structure.
Multimedia paper and watercolour paper that is not too coarse are very suitable.
The order of the steps
- Roll a dark colour acrylic paint onto a Gelli plate with a brayer. Make sure the layer is even and has the correct thickness;
- Choose a magazine photo with enough contrast and place it upside down on the paint layer;
- Press the photo lightly and pull it evenly off the plate. Try not to stop in between as this may affect the layer;
- Carefully remove any stains;
- Allow the paint to dry sufficiently;
- Use a light colour for the next layer. Make the layer even and not too thick;
- Place paper and a protective layer on the plate and place something heavy on it;
- Carefully remove the paper.
Do you have questions or tips? Tell me in the comment box below.

