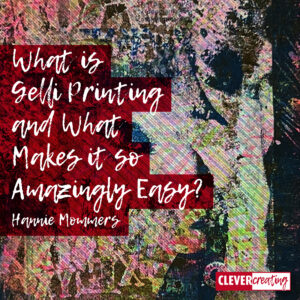
Gelli printing is a form of monoprinting. Each piece of work is unique and usually depends largely on chance.
A Gelli print can be created in different ways. In this article, I describe a number of pure Gelli printing methods and combinations with other techniques.
It is great fun to experiment with this technique. For me, that is the biggest charm of Gelli printing. For starting hobbyists, the advantage is that the learning curve is really low.
Some of the links are affiliate links. As an affiliate associate, I earn a small commission when you purchase any of the products offered through the shared links at no extra cost to you. This helps me to maintain this website and I thank you for supporting me.
Table of Contents
What is a Gelli plate?
A Gelli plate is a flexible, durable, reusable, and transparent plate to make monoprints. You either buy one or you can make it yourself with gelatine, glycerin, sugar, and alcohol.
What materials are needed for Gelli printing?
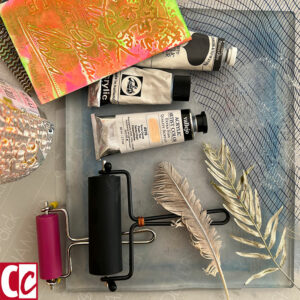
- Gelli plate;
- Brayer. I prefer the softer ones for inking the plate and the harder ones for pressing the paper on the paint;
- Paint. Acrylic paint is great to start with because it dries quickly and gives an instant result. Other paints on a water or oil basis can be used as well, depending on the material you print on;
- Textures, stamps, stencils, etc;
- Paper, fabric, or other substrates;
- Sometimes useful, Gel medium.
Related: Simple Printing Techniques for the Best Relaxing Hobby
Plenty of textures everywhere
Apart from buying stamps (Carabelle is a great brand!), you can find plenty in and around the house to use. For example:
- Leaves and flowers. Some leaves have a tendency to curl when they dry. If you can’t use them right away, let them dry in between a magazine and under pressure;
- Bubble wrap;
- Packing material. I use for instance the fluted paper interior that the cookies are wrapped in;
- Combs or hair brushes;
- Bamboo forks and knives;
- Corks;
- Ribbons and strings;
- Coarsely woven fabric;
- Crumpled-up tissue paper;
- Etc.
The list is endless. Keep your eyes open while hiking either in nature or in town. Have a look in the garage or tool shed. Rumble through your kitchen drawers.

Glue textures on a bottle or a thick tube, it rolls easily and keeps your hands cleaner. Some of my Carabelle stamps are quite big and I have glued them on a bottle as well.
How to make a Gelli print?
Momentarily I post a Gelli print daily on my Instagram account. Have a look here.
Pure Gelli print
The easiest layer is to just roll in the Gelli plate with paint, put a piece of paper on it, and press it with your hands or a brayer. The result will be a more or less even covering of paint.
Textures will make the result more interesting. In a thin layer of paint on the plate, you can press stamps or stencils. Usually, you will be able to make 2 or 3 prints out of this:
- a positive one, pressing the paper on the plate with a stencil or texture still on it;
- a negative image, after removing the objects and pressing another piece of paper on the plate;
- if the paint hasn’t dried too quickly, you can press it on the 3rd piece of paper.
Instead of rolling an even layer of paint, you can paint an image with a brush and make a print of that.
I roll out the excess paint on my brayer onto a newspaper or magazine. A number of layers often have a beautiful tone and I use them as a background or I cut out figures that I paste into a collage.
Combinations with other techniques
Collages have already been mentioned above. Gelli prints lend themselves very well as a background on which anything can be stuck.
Cut figures or magazine pictures. Tissue paper, dried flowers or leaves, or feathers. Basically, anything you use as a material to create a texture, you can also use unpainted as collage material.
Combining different materials and techniques is called mixed media.
Related: My Gelli Prints and Collages in November 2022
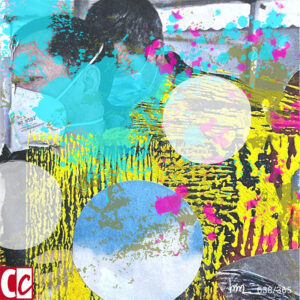
Printing magazine pictures
Printing magazine photos is possible, as long as the contrast is high. Black and white photos are my favourites to work with.
- Thinly ‘ink’ a Gelli plate;
- Press the magazine photo with the chosen photo face down on the paint;
- Remove the photo;
- Gently ‘ink’ a thin layer of Gel medium on the plate;
- Place a sheet of paper on top and press it.
The gel medium is not required by definition, but it makes the result more consistent. It acts as a layer of glue between the paint and the paper.
Applications of a Gelli print
- Background for all kinds of art projects;
- Great as an art journal page;
- Building collages with several of them;
- Bind several together into an art book;
- Illustrations for quotes;
- Creating greeting cards.
Cleaning the Gelli plate
In the beginning, I refused to use baby wipes because I want as little plastic in the house as possible. So I cleaned the plate with soap and water with mediocre results.
(And yes, I know that acrylic paint is also plastic, but I’ve had it for 40 years and it’s best to just use it until I finished all of it, instead of throwing it away.)
Then I ran into 100% biodegradable wipes. The only drawback is that they have plastic packaging. In that respect, my quest remains a difficult one. 🙂
Baby wipes really are much easier than soap and water with a better clean result.
The brayers, I first clean with wipes and then with soap and water to get the last residues off.
What not to do
- Using sharp objects that damage the Gelli plate;
- Expecting a perfect result;
- Assuming there is only one right way;
- Keeping the brayer on the plate when rolling it. Remove the brayer from the plate at the end of a stroke so that the paint is better distributed;
- Putting on too much paint. This will spread to the sides or result in a messy surface;
- Using not enough paint. The paper will stick to the plate and might damage. Choosing the right amount of paint is a matter of experience. You will get the hang of it by keeping on trying;
- Rolling the brayer too long. There will be empty spots in the layer of paint;
- Not cleaning the Gelli plate well enough. If there are greasy spots, the paint won’t stick to that part;
- If you mix too many colours, you’ll end up with brownish mud;
- Throwing a ‘failed’ print in the bin. Since acrylic paint is opaque, adding another layer will make the print look different;
- Using glossy paper or photo paper.
Alternatives for a Gelli plate
If you want to try Gelli printing but don’t have any materials, start small. Look at what you have at home you could use and buy at most one tube of paint.
You may have a paint roller from the last time you painted your house. They are a bit too soft, but then you get an idea of what it will be like.
I had a brayer and acrylic paint at home, but no Gelli plate. So I grabbed the front of an old picture frame. If you don’t have something like that, but you have thick cardboard or a wooden plate, cover it with a plastic bag and pull it tight.
Even with these primitive tools, you can discover if you like the technique enough to make more investments.
Why a Gelli plate instead of a glass pane?
Because of the flexibility, I prefer a Gelli plate to work on to a glass plate. The paint spreads better in my experience. The Gelli plate makes working with paper templates easier.
Don’t mind my personal preference. If you work fine on a glass plate, then you don’t need a Gelli plate at all!
Do you miss something in my explanation or do you have any questions? Use the comment box below.

Hoi Hannie
Hier ben ik weer eens. Ik ben bezig met kleur en gelliprints. Ik werk met Amsterdam acrylverf en heb nu ook wat dekkende kleuren gekocht, zoals cadmium geel en rood, naast meest transparant of semitransparant waar ik normaal mee werk. Bij het printen is het belangrijk, merk ik. Soms valt het tegen als je er geen rekening mee houdt. Heb jij tips of een systeem voor het gebruik van dekkende/transparante verf dat perfect werkt??
Hoi Jos,
blijkbaar is deze vraag van jou ertussendoor geschoten, dus sorry dat ik pas zo laat reageer.
Als ik collage-papieren maak, maakt het me niet zoveel uit of de kleur dekkend of transparant is. Dan gaat het meer over structuur.
Als ik foto’s print let het wel wat nauwer. Ik werk ook veel met Amsterdam, maar voor die foto’s heb ik momenteel een voorkeur voor Sennelier.
Dus om jouw vraag concreet te beantwoorden: nee, ik heb geen systeem. Meestal vind ik het niet erg als het resultaat niet perfect is.
Succes en groetjes.
Hey,
Which “Gel medium” do you use?
Thanks for answering
Greetings from Holland!
Hi Florina, I have Liquitex matte medium. A well-stocked hobby store will sell this. I order mine from an online store, Mi Tienda de Arte in Spain. They are part of a chain (including Craftelier) that is located in different countries. I am not sure if you can order from the Netherlands, but maybe Pippoos will have it?
Good luck. Greetings from a fellow countrywoman 😀