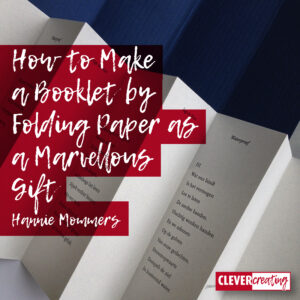
Sometimes the budget is scarce and the wish to make an outstanding item is big. For example, you want to have a great present for a birthday or anniversary. Or you want a gift as a souvenir at a customer meeting, like a friend and I did.
In this article, I explain how to make a booklet by folding it, without the need for any other resources but paper and an A3 printer.
And I show another way of folding a booklet for which you don’t need a printer unless you want to use text.
By the way, these booklets are also great as a maternity gift, with photos of the baby.
Some of the links are affiliate links. As an affiliate associate, I earn a small commission when you purchase any of the products offered through the shared links at no extra cost to you. This helps me to maintain this website and I thank you for supporting me.
Table of Contents
How to make a booklet by folding paper?
Making an accordion booklet by folding a piece of paper is quite easy. Another 8-page booklet is slightly more complicated because you have to consider the orientation of the different pages.
A poetry afternoon
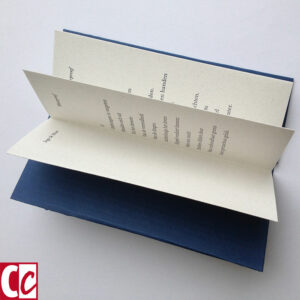
At an event, I had organised with a friend, we wanted to give our audience a poem bundle. We both wanted to show off our skills – he as a poet and I as a graphic designer.
There was just one minor problem: we didn’t have any money to spend. 😉 Problems can lead to great solutions. The end result was a folded booklet which made our guests really happy.
Form follows function
The poems of my friend have a specific style. The sentences are very short, hence a small page was an obvious choice. So the form dictates the found solution of the folded pages.
It’s not common for a text to influence the form that strong, but also with ‘normal’ text, you can make folded pages. Just make sure the columns are small and the letter font is not too big.
And I would use the pages on the opposite side as well in that case. I mean the pages I left blank, not the backside of the paper.
Inside pages
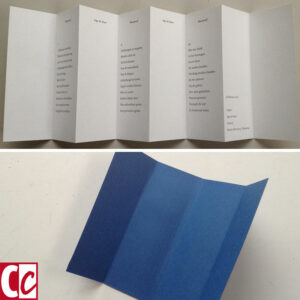
For the pages, I chose a paper of 100 grams of good quality that gave a nice feeling to my fingers when I held them. The sheet is an A3 paper, printed with a laser printer, and then cut longitudinally, resulting in two strips of 420×148,5mm.
The strip is folded a few times as a harmonica, resulting in 8 pages of 52,5×148,5 mm.
The cover is folded as well
The cover is an A5 of 300 grams vergé cardboard. Vergé paper means ‘ribbed paper’. It is produced by the mesh on which the paper is made, looks like lines in relief, and gives the paper a cool look.
The outside could be this thick because it is not printed!
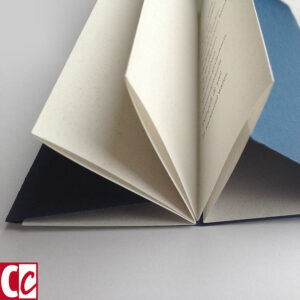
First, the cardboard is folded in half and then again just halfway, leaving space for the white pages to fit in.
A special folding mode
Sure, you can also make a booklet by folding some papers together and stapling them, but this looks more special don’t you think? And our edition contained just 30 copies, making it not too time-consuming to make.
Japanese folding techniques
I learned this way of folding because I was interested in Japanese folding techniques. Origami was the ultimate result of the way the Japanese folded paper, yet they also have great ways to package presents.
Even Marie Kondo, the tidying guru, uses Japanese folding methods to furnish a wardrobe.
Related: Making a Ceramic Memorial: Fishing Disaster in Morecambe Bay
An A7 booklet
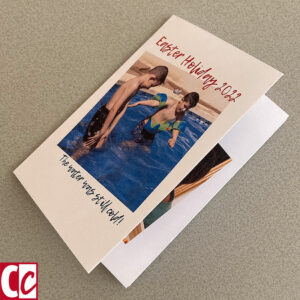
The paper you buy in the store has the A4 format, 297×210 mm. In Europe that is. The size is different in the US. US Letter measures 8.5×11 inches, which is 279,4×215,9 mm. Not that it matters for the folding as that can be done with any size.
Half an A4 is called A5, half of that is an A6, and half of that is called A7. If you want a larger booklet, you’ll have to use other measures.
In the instructional video I made, I use a paper-knife to press the folds well. While having a paper-knife is handy, it isn’t essential. You can also use the blunt side of a knife or scissors.
Folding
- Use paper that is not too thick;
- Fold lengthwise;
- Then fold the short sides together;
- And again. If the paper is too thick, you can do that last step in 2 parts. Have a look at the video;
- Unfold the paper;
- Fold the short sides together;
- Cut the centre line halfway;
- Unfold the paper;
- Fold lengthwise;
- Gather the outsides together and push them in opposite directions to create the pages.
You can paste photos into the booklet that was created in this way. Or other things, like dried flowers. Also, you can create a layout in Canva, where you combine photos and text.
Tip: If you want to fold a printed sheet of A4, first make a dummy on which you put the page numbers. That way you know how to make the layout.
Related: 10 Tips to Crop Pictures the Right Way for your Blog or Magazine
An A5 book or section
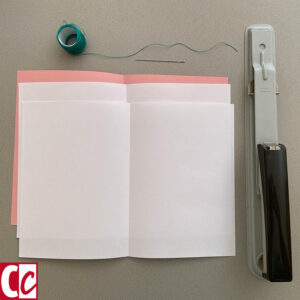
An A5 format book is more about binding than folding. Yet, this article is not complete without mentioning it of course.
Probably you are familiar with A5 books. Even in the stencil era, A5 booklets were made for weddings and parties.
The simple form is some sheets of A4 that are folded in half and then stapled together or attached together with a needle and thread.
Sometimes you need sections
You’ll notice that the edges don’t match exactly as the book gets more pages. At some point, you will have to work in sections and bind those sections together with one of the binding methods.
The thicker, the more complicated, as you will understand. So let’s keep it simple and limit ourselves to folded booklets. 🙂
Can you think of more occasions to use a folded booklet? Let me know in the comment box below.
This article is an update. Originally published on 13-11-2014.



Wow, what a nice short and instructive video you made. This is a great help. Did the grandkids enjoy their booklet?
The booklet made me think about the way we correspond with close relatives. Most biographies I read, are based on letters people wrote. For example, Freud frequently corresponded with very intimate letters with his sons and daughter. And of course with his many friends in the science of psycho-analysis.
Modern social media, however, do not invite to share confidentialities. Everything must be short and shallow. Moreover, I notice that most people don’t want to write long letters anymore.
The booklet you designed for your grandchildren, though, is a very nice way to secure intimate events and save them for prosperity. Thank you, for sharing such a beautiful idea.
That is such a sweet compliment, thank you, Lieve. Yes, the kids loved it very much. It’s so simple to make, so I printed 2 of them and gave them each their own copy. You know how brothers can be, the sweetest friends at times, and jealous at other times. 🙂
With you, I think it is a huge pity we hardly write letters anymore. I am even thrilled when I get a postcard in the mailbox, as these are often sent digitally as well. Recently, I read the biography of Hella S. Haasse, a Dutch writer, and indeed a lot of the knowledge of the biographer came from letters. I wonder how future biographies will be written. Maybe by browsing social media and YouTube. Oh well, every time has its own advantages and disadvantages.
Thanks for your comment and have fun.
Super cool, this is such a simple and stylish solution. I’m going to try it too.
My colleague will soon be employed for 25 years and we have an A3 printer at the office. So that should be doable.
Thank you for the idea.
Thank you, Edward. Yes, it’s nice, isn’t it, such a Japanese way of folding 🙂
By all means, go ahead and try that idea as well. That’s what I create my articles for, to inspire others. Good luck.
Really beautiful, Hannie. I had the pleasure of attending that meeting and I still have that booklet. Thank you so much.
Thanks, Paul! Mission accomplished, I’d say. That was what Ingo and I had in mind and I’m glad it turned out to be a must-have.