
Handbuilt ceramics, composed of clay slabs, ensures a lot of creative freedom. With slabs of clay, you can make vases, pots, and free work of all shapes and sizes.
For a professional ceramist, it is not a question of how to make perfect slabs of clay. He or she uses a slab roller. Such a device is very similar to a printing press and makes perfect slabs that are the same thickness everywhere.
It is impossible for a hobbyist to purchase such a device. It takes up too much space and is too expensive. Hence my tip, which gives just as good results.
Some of the links are affiliate links. As an affiliate associate, I earn a small commission when you purchase any of the products offered through the shared links at no extra cost to you. This helps me to maintain this website and I thank you for supporting me.
Table of Contents
How to make perfect slabs of clay?
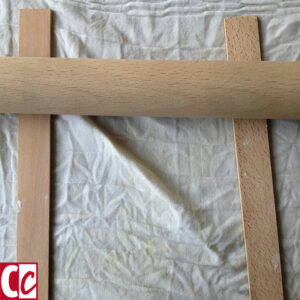
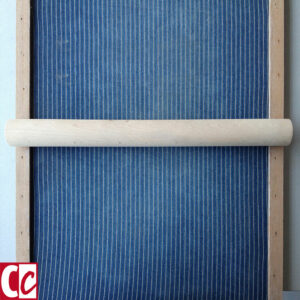
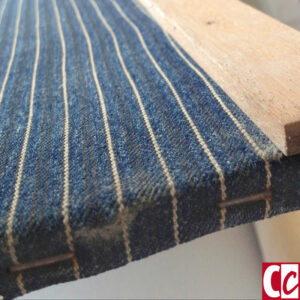
Important for a clay slab is an even thickness without enclosed air pockets. You make it with a cloth, 2 slats, and a rolling pin. The best result is achieved when the canvas is stapled to a plywood board with fixed slats.
Ever tried to roll clay on cloth?
If you did, you probably will have noticed that it’s hard to keep the cloth tight and flat. To make slabs of clay, I used to roll the clay on a loose piece of textile, supported by two wood slats.
There is nothing wrong with that method. Just that the fabric didn’t always behave the way I wanted it to behave. It often crinkled, making lines in the slabs I didn’t want.
Then one day somebody gave me this brilliant tip. I thought it was the egg of Columbus. (Do you use this expression in your country as well?)
Staple the cloth to a board

When you staple the cloth to a board, you won’t get wrinkles in the slabs anymore. Once I heard this tip, I couldn’t believe I had never thought of it myself. It’s so simple, yet so effective.
Of course, I knew about these machines that made slabs even more perfectly than mine, the slab rollers. But these machines had 2 downsides:
- I couldn’t afford them as a starting ceramicist. Especially since I wouldn’t want these toy machines, but the industrial kind;
- My atelier was too small to have room for such a big thing.
Needed supplies
One board, two slats, one piece of leftover textile, and some handiwork. It’s not very hard to make this but you don’t have to be ashamed to ask for help when you know someone else can do it better.
- Waterproof plywood;
- Slats in various thicknesses, 2 per thickness. I have 5mm, 7mm and 8 mm;
- Sturdy fabric. I bought denim on the market that had just a little bit of texture. The less texture the better;
- Stapler;
- Hammer;
- Nails with a small head;
- Driving punch;
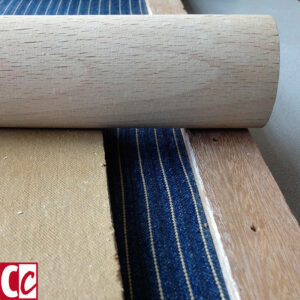
- Roller. A kitchen rolling pin is usually too short in length;
- Clay.

Make sure the width of the board matches the length of the roller!
Pay special attention to the stapling
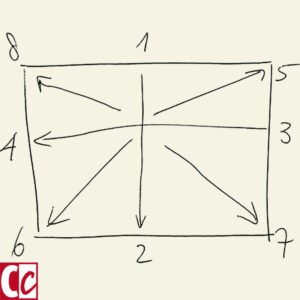
If you have ever stretched watercolour paper with paper tape, you have experienced that the sequence of the stretching is important. In much the same way, the fabric should also be stretched on the plywood.
If you do it the right way, your board will last for years.
Staple the fabric following the pattern in the drawing. Start at one long side, pull the fabric very tight on the other long side and staple it there. Then the two short sides. After that, fix the cloth at the corners. And finally, staple in between at a distance of approximately 5cm.
Moisten the fabric with a plant sprayer before you start stapling it to the board. That way you can tighten it much better.

Let the textile dry thoroughly and hammer the slats on the long sides of the board. It’s very important that the width of the board matches the length of your roller! Drive the nails a bit further into the wood with the punch so they won’t hinder the roller in any way.
Make as many boards as you need thicknesses. I had 3 different boards and also made a 4th one without slats for thicknesses I didn’t need very often.
On this one, I worked with loose slats. And I also used it as an alternative to the waffle wipes when I needed large and long rolls of clay. In that case, I moistened the board with the plant sprayer.
Related: How to Make the Perfect Clay Rolls with an Unveiled Secret Solution
Easy cleaning
Once in a while, I put my boards outside against the wall of my workshop and sprayed them clean with a garden hose.
Oh, and one more tip: to allow the slabs to dry evenly, it is necessary to turn them regularly. With a board that has no slats stapled to it, this is very easy. Place that upside down on the clay slab plus board on which it is drying and turn them over at the same time.
How to make a vase with clay slabs?
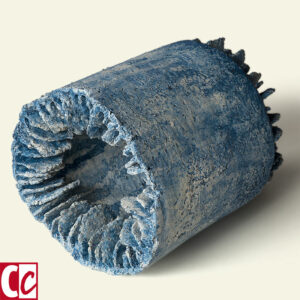
A pot or a vase is very easy to make with a clay slab. Handy for this are PVC pipes in various thicknesses.
Make a slab for the upright wall and a smaller piece for the bottom.
Wrap a newspaper around one of the PVC pipes and secure it with some tape. This prevents the slab from sticking to the pipe.

Determine the size of the slab by carefully bending it around the pipe. This works better than measuring with a centimetre.
Make sure you have some extra space and cut both halves diagonally at the same time. Bend them back a little, scratch the cut surfaces, and smear some clay slip on them. Press them together while the clay is still around the PVC pipe and finish off the cut line.
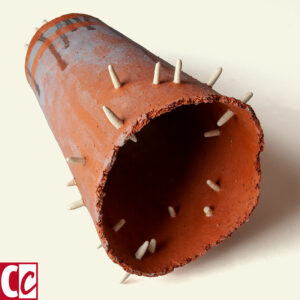
Place PVC pipe plus clay cylinder on the small slab and mark the bottom. Cut it out, roughen the right surfaces in advance, and let it become leather hard.
Let the form dry a bit and slide it off the pipe in time, otherwise, it will shrink and not come loose. However, if you slide it off the pipe too early, you run the risk of it denting easily.
Attach the cylinder and bottom to each other with clay slip. Reinforce the bottom on the inside with a thin roll of clay that you finish well.
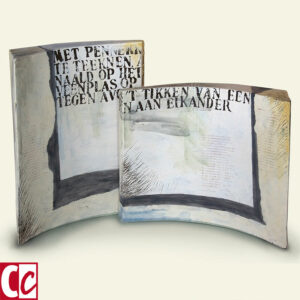

Free works of art
Clay labs are ideal for casual work. As you can see in my examples, I have often incorporated clay slabs into my work.
By working in parts, you can even get very large shapes.
Do you use clay slabs in your ceramics? Tell me in the comment box below.
This article is an update. Originally published on 24-04-2013.

You make it look so easy, Hannie! My first try was beyond unsuccessful, I couldn’t make it hold its shape at all… I’m still gonna have another go at it, playing with clay is one of the few things that relaxes me.
Hi Piper, your clay was probably too wet. Try next time to leave the slab for a while and then start building. When your clay is what is called ‘leather hard’ it will hold its shape much better. Leather hard means the clay has dried to the point it won’t shrink further and still is flexible. Test it by lifting a corner of your slab. When that is too easy, the clay is still too wet. When you lift it and it acts like leather would – not bending completely but giving a little bit of resistance – then the building will go like a charm.
Good luck, I hope your next project will be more satisfying. 🙂