
Usually, our first introduction to clay is making a thumb pot. And because the size is then limited, this is followed by making clay rolls.
Making clay rolls or coils seems like such an easy technique but as with all techniques, it becomes easy with experience and the right actions.
And sometimes someone has to give you the right idea, as I learned in a clay workshop. Ideas that are like the egg of Columbus are the best, don’t you think? So, how to make the perfect clay rolls?
Some of the links are affiliate links. As an affiliate associate, I earn a small commission when you purchase any of the products offered through the shared links at no extra cost to you. This helps me to maintain this website and I thank you for supporting me.
Table of Contents
How to make the perfect clay rolls?
Clay rolls are perfect for building ceramic objects. You need to use the right kind of clay, a moist waffle cloth, and to put your hands the right way.
Right kind of clay

When you make a pot on the pottery wheel, you will use clay without grog or chamotte. For hand-building ceramics, it is better to choose clay with grog.
The disadvantage of grog is that the surface cannot always be finished smoothly. Although there are tricks for that too.
Related: How to Smooth the Surface of your Clay Object
The advantage of grog, which outweighs the disadvantage, is the ability to create larger objects and the reduced chance of breakage later in the kiln when the items are fired.
Grog also ensures less shrinkage of your ceramic object during drying, depending on the percentage present in the clay. The percentages are usually 25% or 40%.
Grog or chamotte is clay that has already been fired and crushed. Depending on the size of the grains, the grog is called coarse or fine. Coarse grog has a thickness of 0-2 mm. The fine grog is 0-0.5 mm.
The secret of the waffle cloth
In a lot of my work, as a ceramicist, I needed rolls of clay. These could be thick, even coils. Or rolls that varied from thick to thin.
I used to roll them in between two hands. Usually ending up with lumpy and strange-looking things. Not too bad, but certainly not perfect.
Clay draws moisture from our hands, causing the rolls to dry out too quickly and break before they were the right thickness.
You can make rolls on a work table. However, depending on the material, it will stick to the substrate.
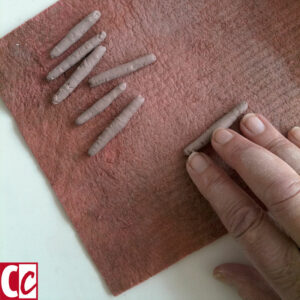
The solution is to use waffle wipes. You can make them wet so that the moisture that your hands withdraw from the clay at the top is compensated at the bottom.
A simple solution, yet very effective
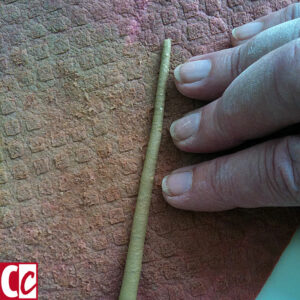
Take a simple waffle cloth – I have several in different colours, not that the colours are of any importance, the different textures do, however – and wet it. Squeeze it so it isn’t too wet. Put it flat on the table and roll a little piece of clay on it.
Piece of cake!
Related: Start Making Ceramics Now with Clay Tools from the Kitchen Drawer
Try several different kinds
As you can see in the pictures I used several textures of waffle cloth.
Although I am very loyal, once used to a certain brand, I occasionally buy different kinds as well. Just to try it. Some deteriorate too easily, others have just the perfect texture and sustainability.
In the years that I was a ceramist, I was already environmentally conscious about the use of heavy metals, but less about the use of plastic.
Nowadays I would look for waffle cloth based on organic cotton and bamboo or crochet and knit them myself.

Using fingers or hands
On little pieces, I used just my fingers. If I needed larger rolls, I used my whole hands. The easiest method is to spread your fingers and keep them more or less stiff. Don’t forget to put off the rings you are wearing!
The waffle wipes I had were about 20 x 20 cm. So at times, they would be too small for the needed rolls. Sometimes it would suffice to use the cloth diagonally. Other times I used the cloth-covered planks I made for my clay slabs because they are bigger.
Related: How to make the perfect slabs of clay
What can you make with clay rolls?
Smooth clay pot
The simplest form is a clay pot. You start with a thumb pot that will be a raised bottom and build on that with rolls. Then smooth it out inside and out, trying not to trap any air bubbles.
With this form, it is necessary to make even and equally thick rolls.
Clay pot with structure
If you only smooth the rolls on the inside, you will have a texture on the outside. This comes at the expense of sturdiness. Depending on what you ultimately want to do with the object, you will have to reinforce the inside.
You can make the texture as even as possible or apply small and large or thick and thin.
Rolls as decoration
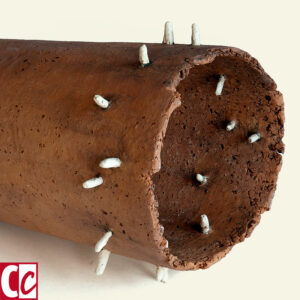
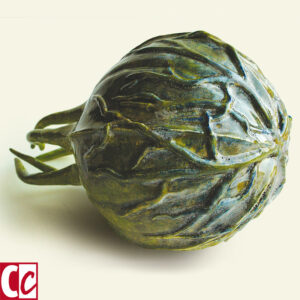
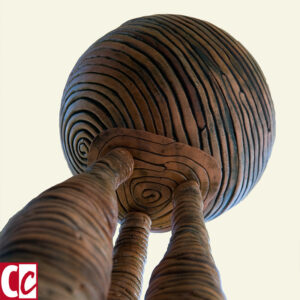
Finally, the rolls can only be used as decoration and not for building. You can combine them with a slab of clay, as I did in “Chimney“. Or with a form made in a mould like my “Lady in the Mist”.
Let yourself be inspired by the technique and the form and above all, experiment. Even a simple technique such as making rolls offers so many possibilities!
How do you make your clay rolls? Tell me in the comment box below.
This article is an update. Originally published on 21-04-2013.


Impressive and very beautiful results you get with such seemingly simple techniques. Genuine pieces of art.
It’s also amazing that with these basic materials and ancient techniques, you create such very modern, abstract art.
The skill to make these clay objects must require years of training, I guess. But I also expect you need a lot of patience. You have to plan ahead. And be able to visualize what you want your end result to look like!
Compliments also for your excellent and to-the-point explanations.
LOL, I am blushing now. Yet, thank you so much for your compliments, I truly appreciate it.
You know, the big advantage of clay is you don’t need a huge number of years of experience, you can start right away and have good results.
Although you are right in needing patience. Sometimes because it doesn’t work out the way we envisioned it. Sometimes we need to wait until the clay has the right amount of moistness. And at times it’s hard to wait until the work is ready for the kiln. 🙂
As far as the visualizing concerns; we are all different. I see things in my head or in nature, and then I draw a lot before I make anything. Others just start and see where it’s heading.
Thanks for your comment, Richard, and I hope you can get the tips into practice.
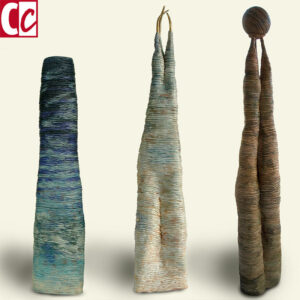
How is your “Reaching for the Sky” series so tall?! The second I laid my eyes on them I thought they were small statuettes. I have no patience so I don’t see myself delving into the realms of ceramic, I wouldn’t finish a single piece.
Hi Natalia, what a pity you don’t have the patience and obviously won’t start because of that thought about yourself. I know from my former students that the itchy, stressed ones loved to work with clay because it made them more relaxed.
On the other hand, we all have our own way to express ourselves and I am sure you have yours as well. 🙂
Thanks for giving me the subject for one of my future articles: working tall with a small kiln. I build and fire them in parts and stack them later on top of one another.
Take care, Natalia, and have fun.